Teams Direct Message Notifications Setup Process
ALICE Receptionist can be integrated with Microsoft Teams to send visitor check-in and other notifications directly to employees through a Direct Message. This guide will walk through how to set up this integration between Microsoft Teams and ALICE Receptionist.
Prerequisites
-
Access to an Azure account with permissions to manage applications in Azure Active Directory (Azure AD). Typically, the following Azure AD roles include the required permissions:
-
Application Administrator
-
Application Developer
-
Cloud Application Administrator
-
-
The Microsoft Teams application included in the Office365 suite.
Registering the ALICE Application With Azure Active Directory
Step #1 – Creating the ALICE Application in Azure
Sign in to the Azure Portal and choose the Azure AD tenant in which the application will be created.
If your account is logged in to more than one Azure AD tenant, switch the directory to the desired Azure AD tenant using the profile menu at the top right corner of the page.
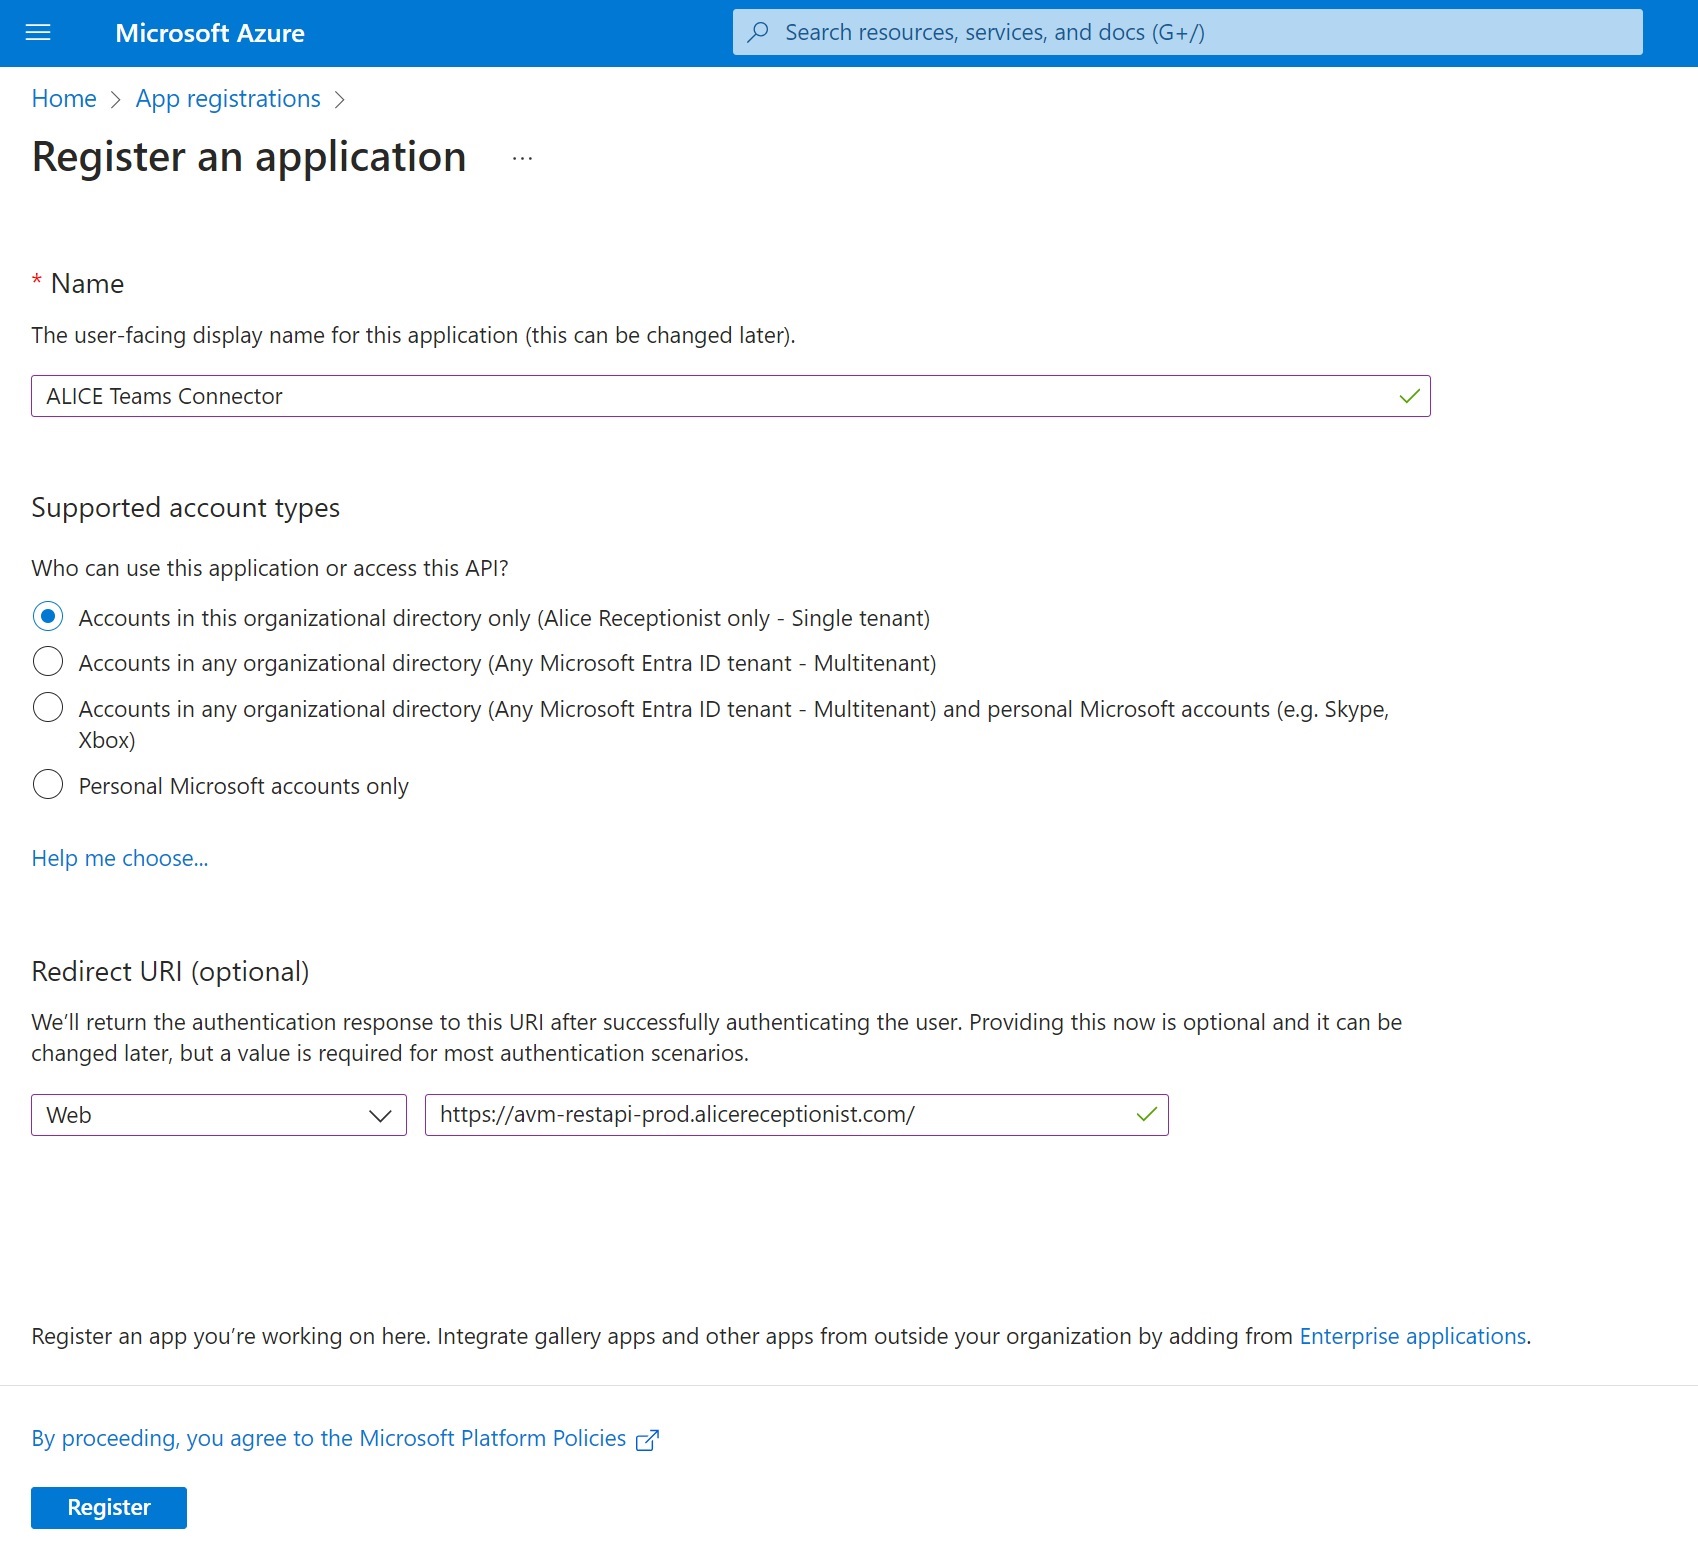
Navigate to App Registrations, then select New Registration.
Enter the following application registration information.
-
In the "Name" section, insert the application name that will be displayed to the app users. For example, "ALICE Teams Connector."
-
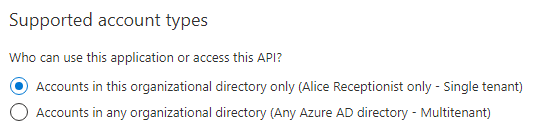
Under "Supported account types," select Accounts in this organizational directory only.
-
In the "Redirect URI" section, select Web from the drop-down window and enter the following redirect URI:
-
https://avm-restapi-prod.alicereceptionist.com/
-
-
Select Register to create the application.

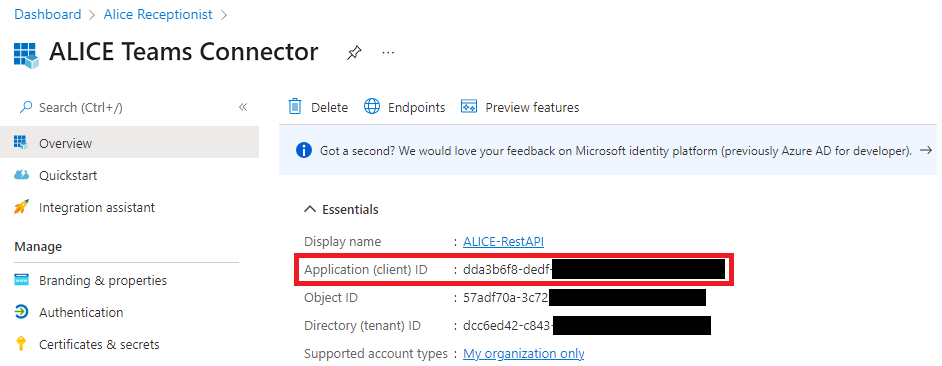
On the app's registration screen, note the "Application (client) ID" value, as it will need to be used later in the ALICE Portal.
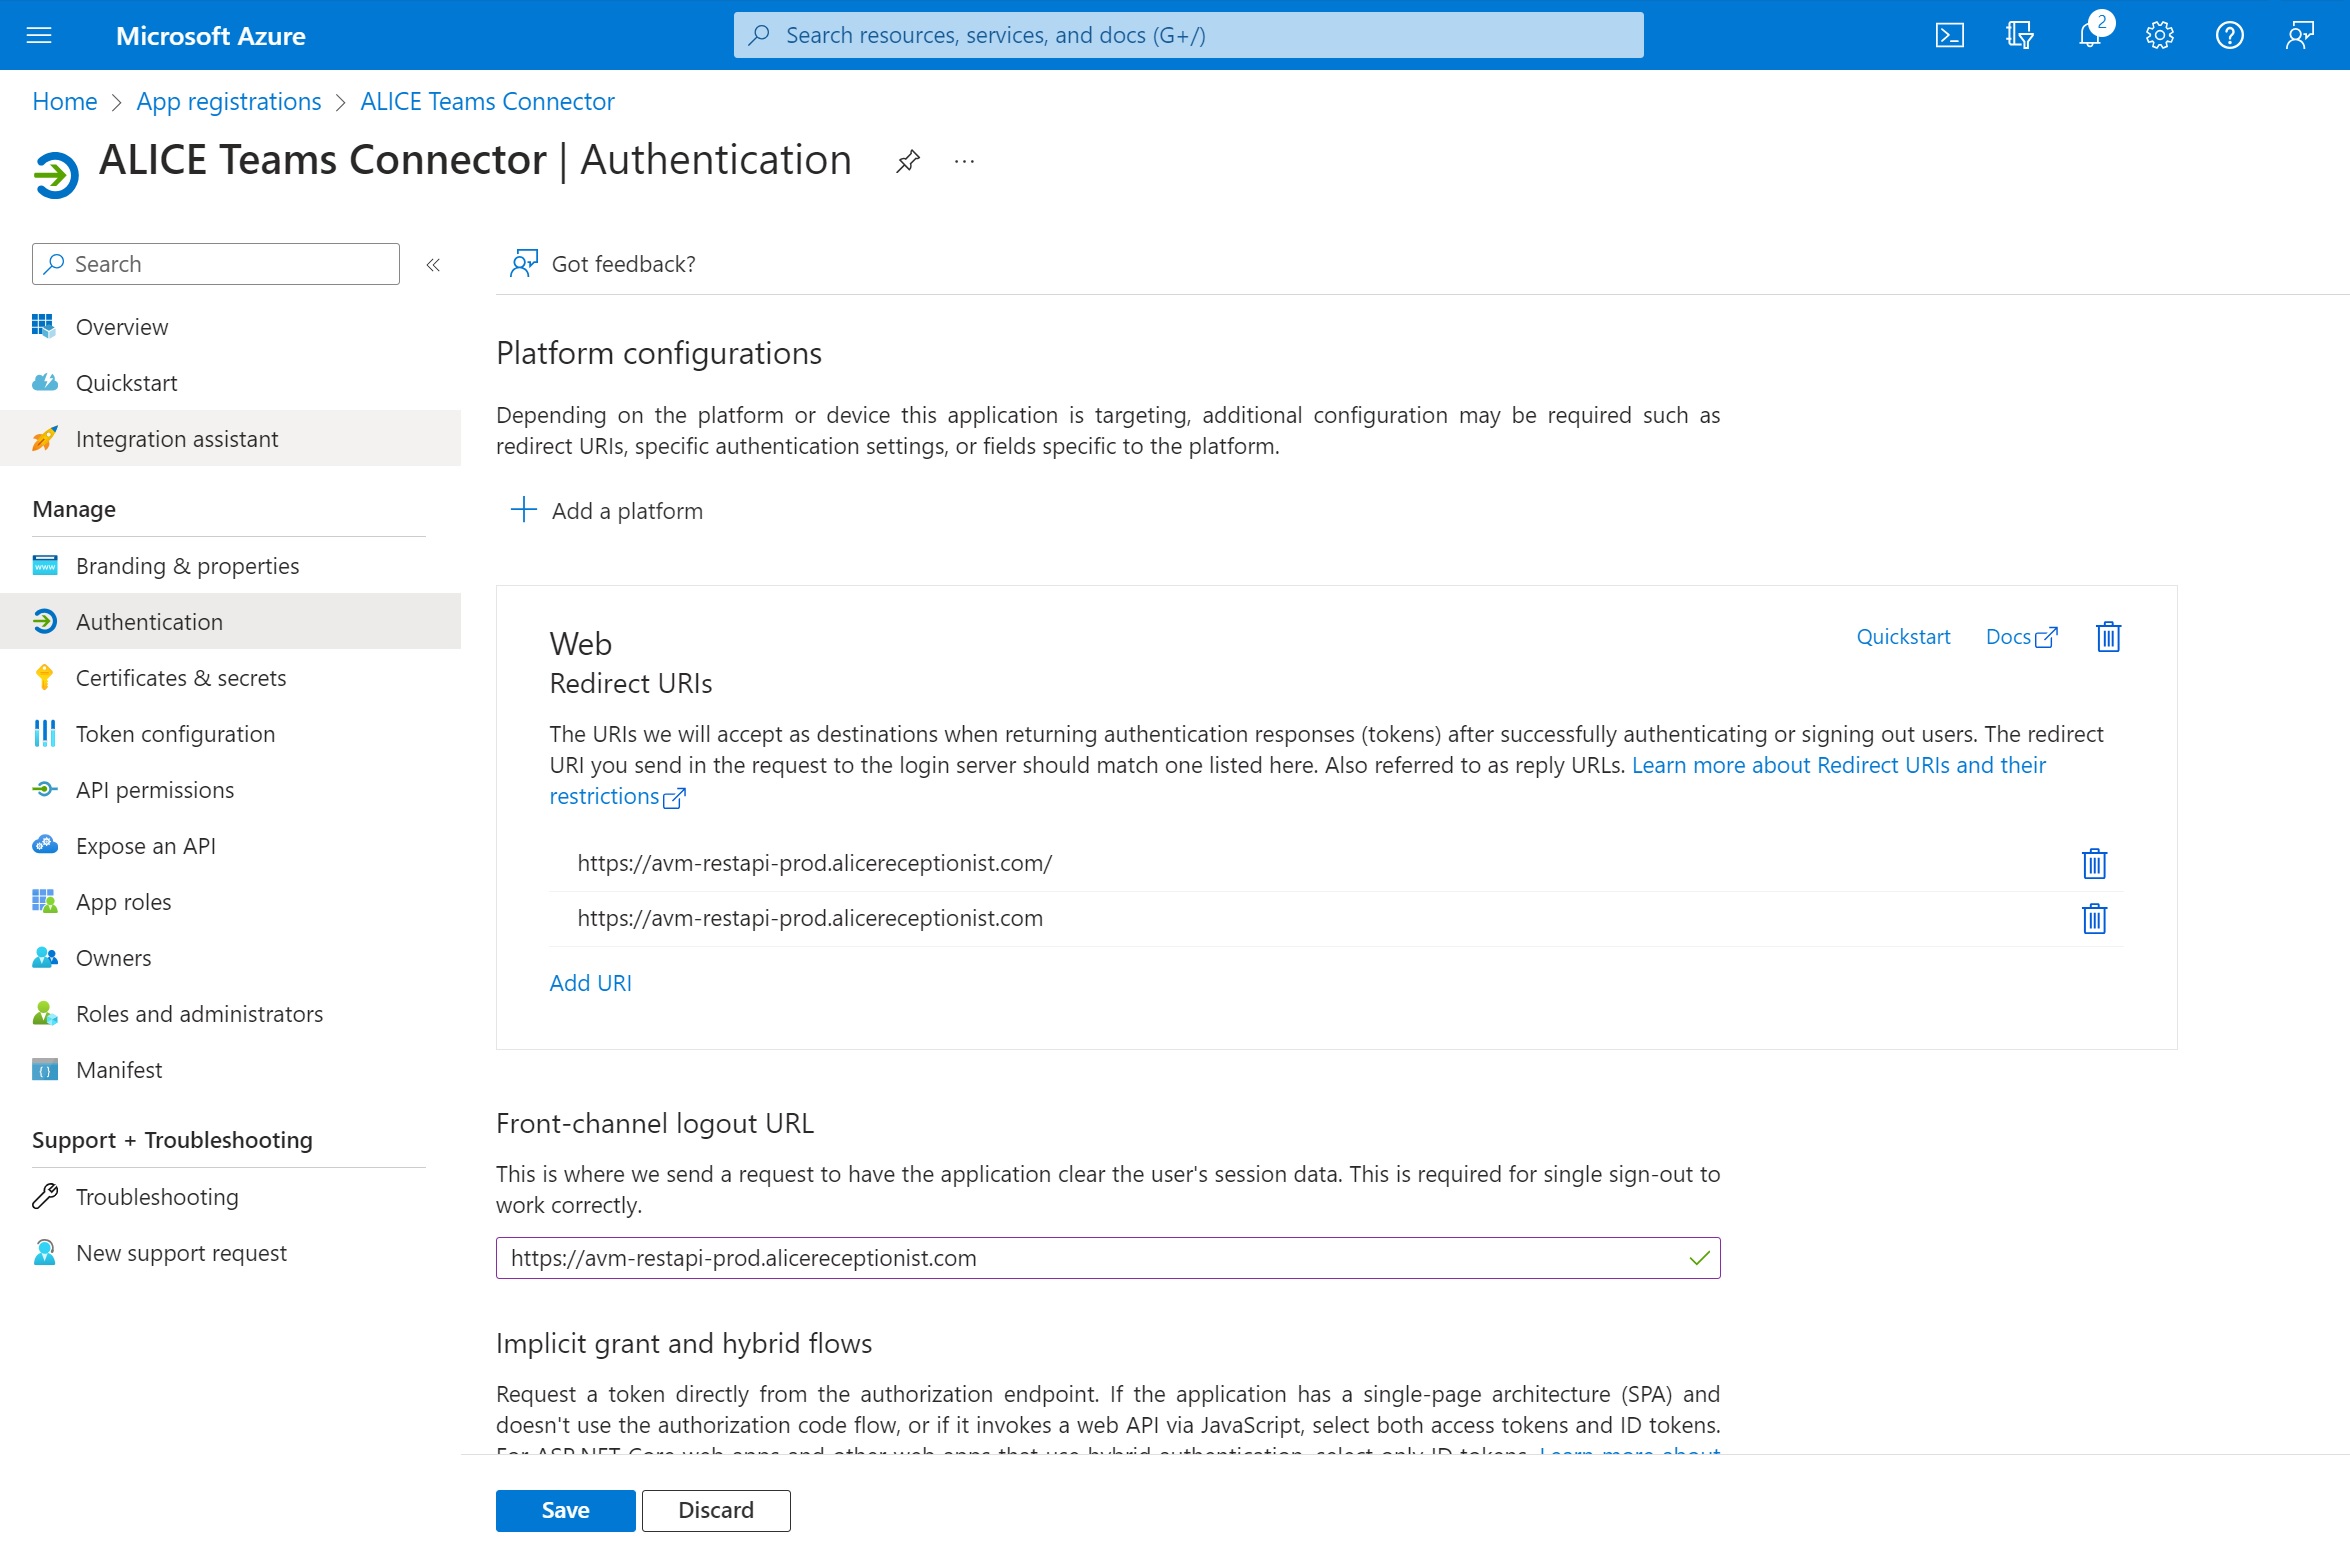
Under the "Manage" section, select Authentication.
Enter the following information:
-
If a platform has not already been added, select Add a platform and select the Web option.In the "Redirect URLs" section, enter the following URL:
-
https://avm-restapi-prod.alicereceptionist.com
-
-
In the "Front-channel logout URL" section, insert https://avm-restapi-prod.alicereceptionist.com
Click Save.
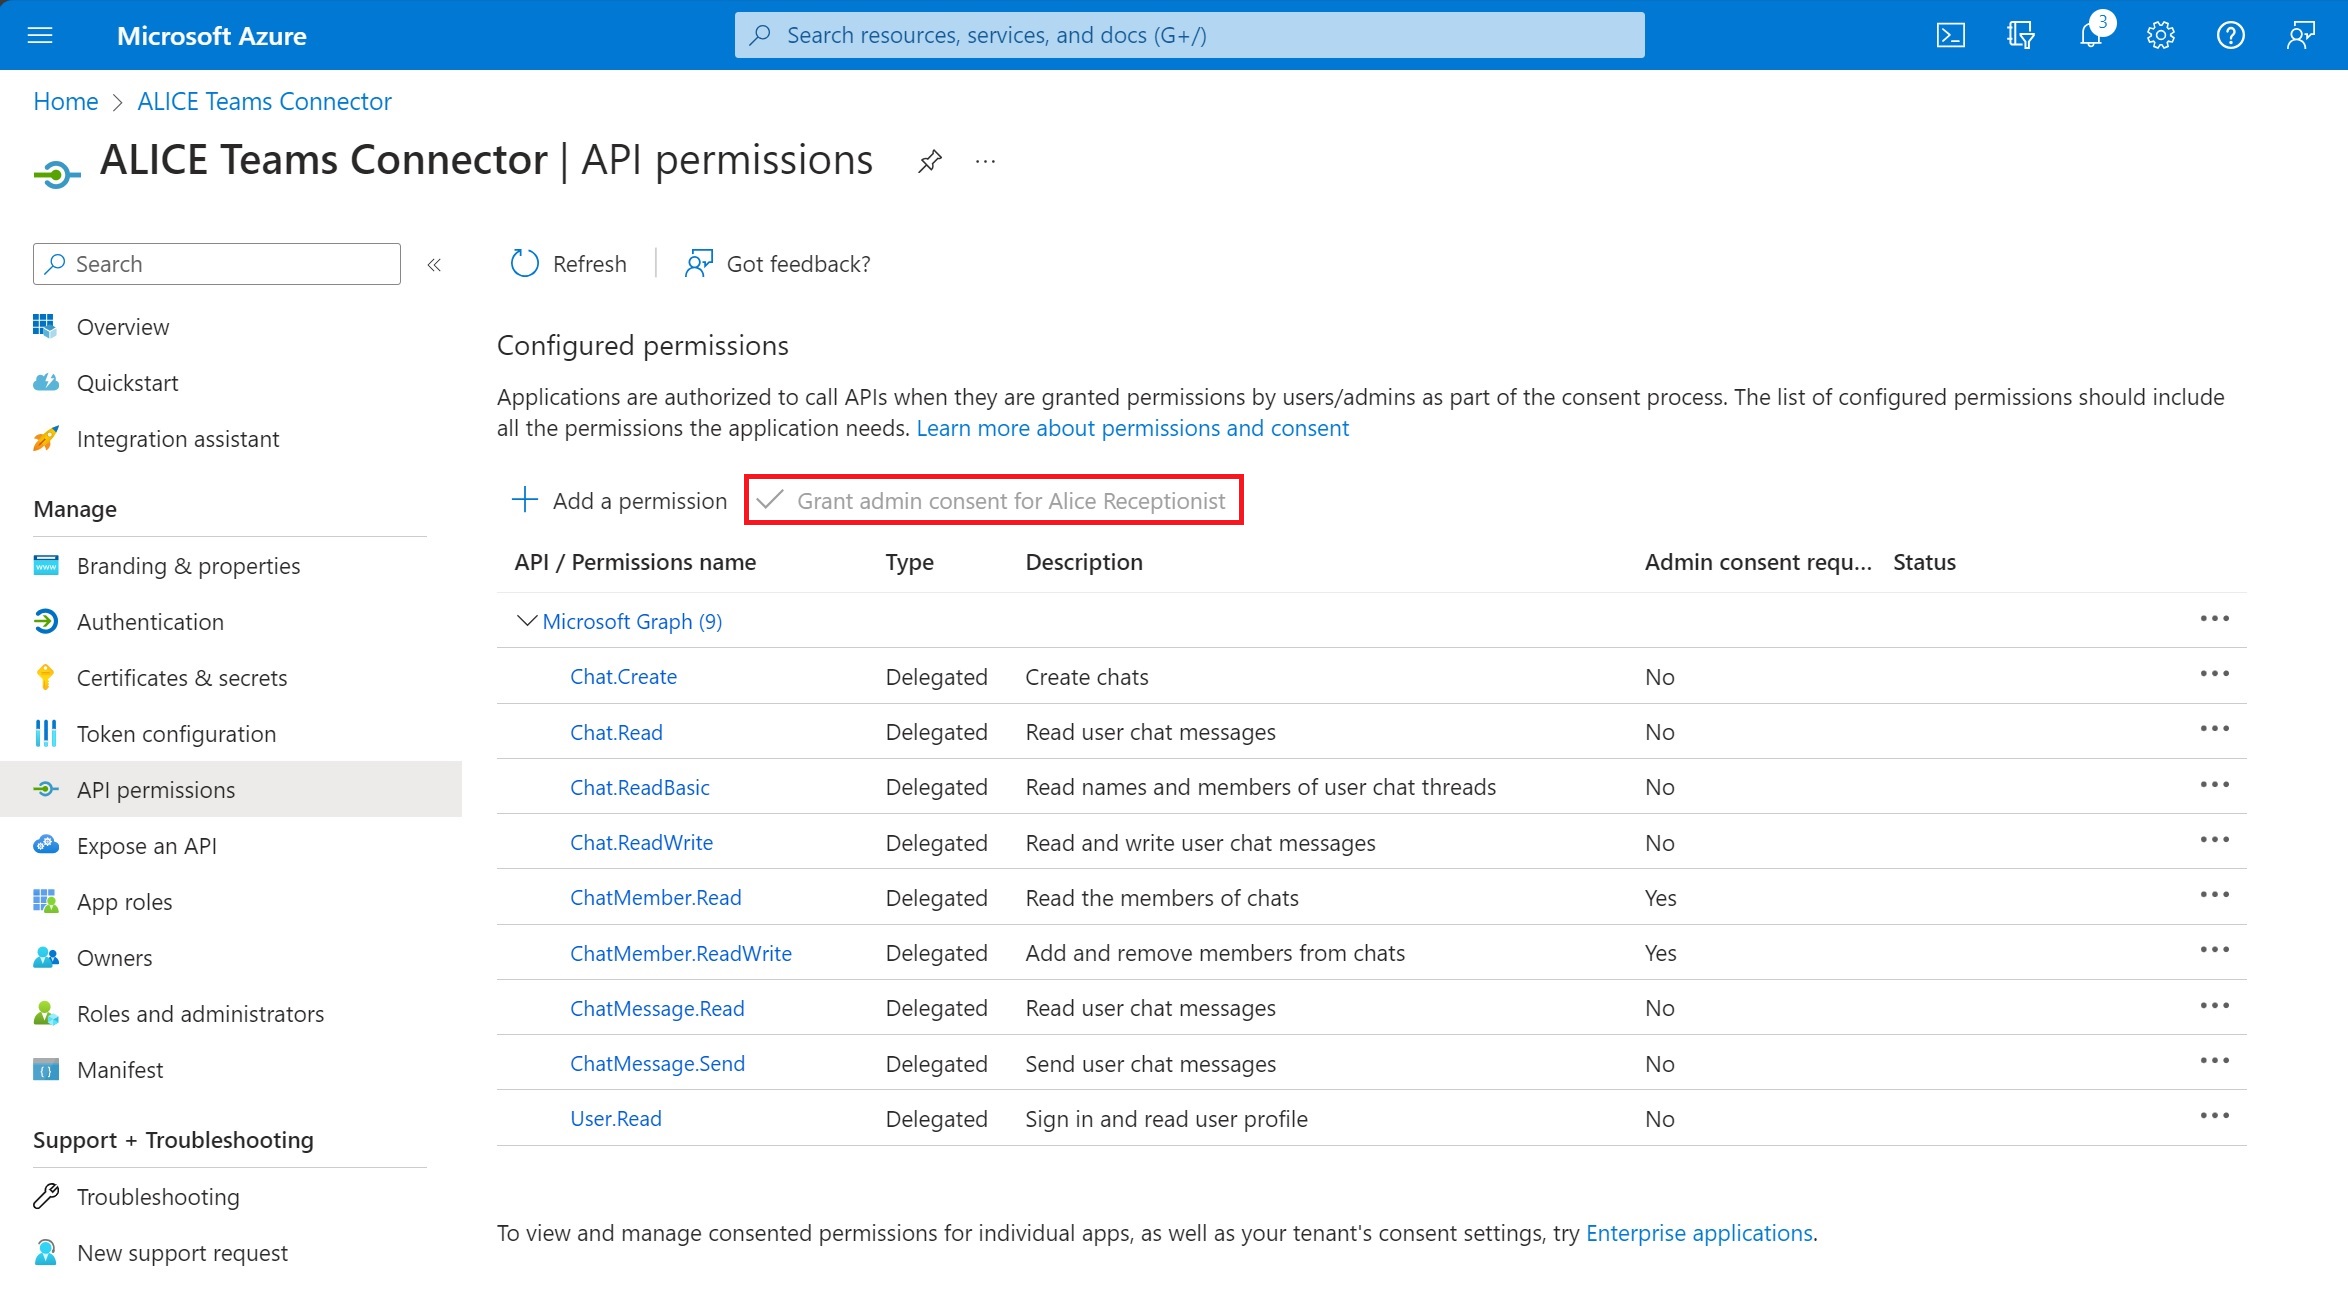
Select API permissions under the "Manage" section on the left side of the screen.
Select the Add a permission button.
![]()
In the new pop-up window, ensure that the "Microsoft APIs" tab is selected and select Microsoft Graph.
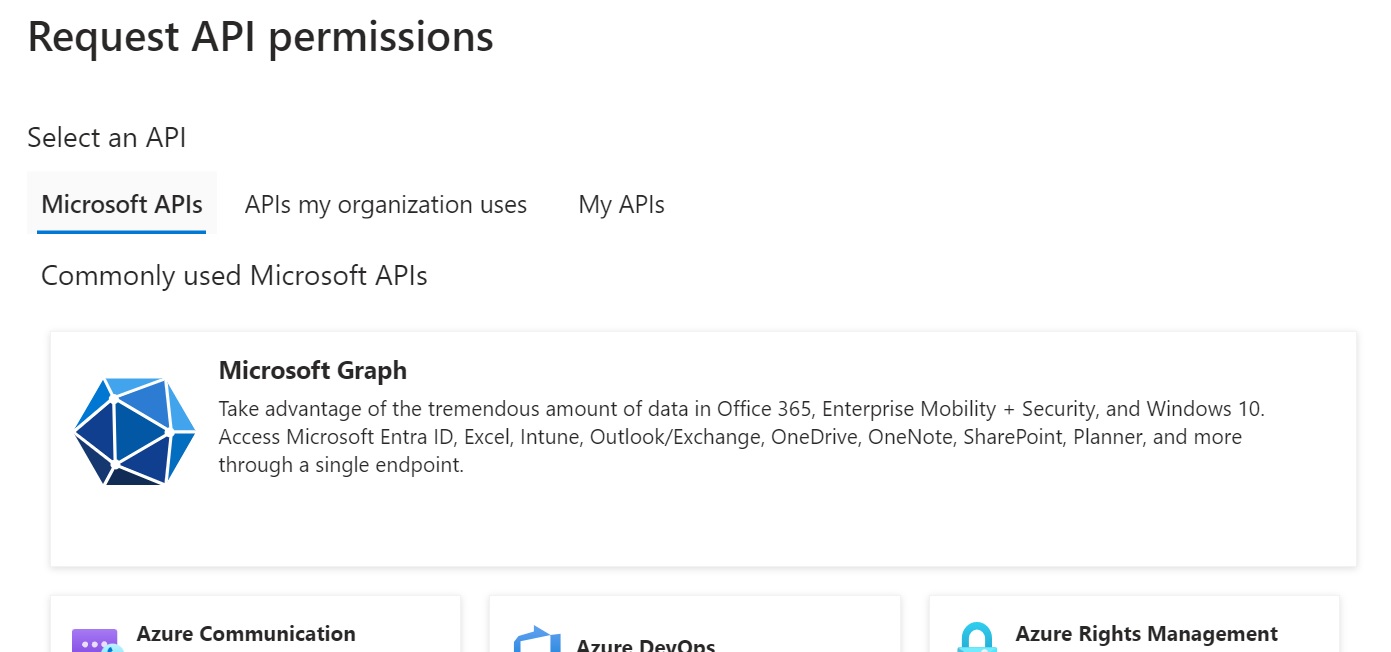
Select Delegated permissions, then add the following items from the list by using the search field.
-
Chat.Create
-
Chat.Read
-
Chat.ReadBasic
-
Cheat.ReadWrite
-
ChatMember.Read
-
ChatMember.ReadWrite
-
ChatMessage.Read
-
ChatMessage.Send
-
User.Read
Select the Add a permission button at the bottom of the page.
Once all listed permissions are added, click the Grant admin consent for... button.
On the Authentication screen, set the "Supported account types" to "Accounts in this organizational directory only."
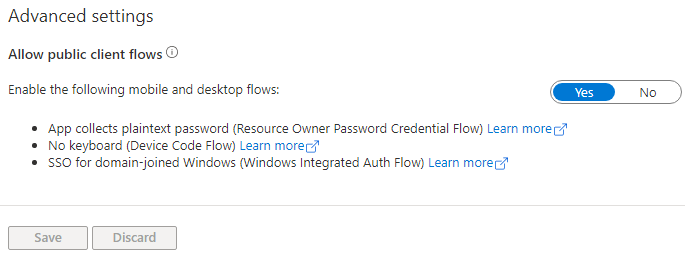
Under the advanced settings section, turn on the switch for “Enable the following mobile and desktop flows.”
Click Save.
Step #2 - Creating the ALICE Team User
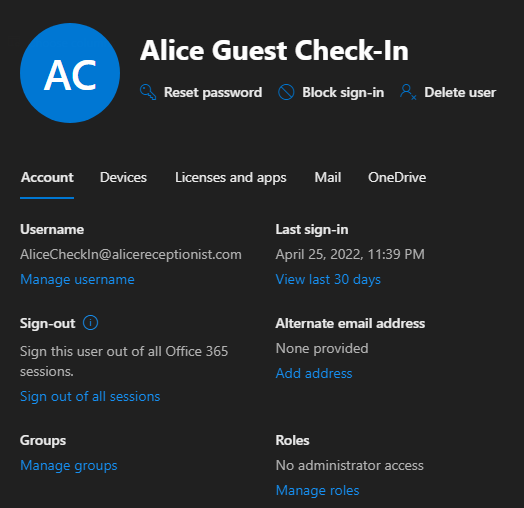
In Microsoft Teams, add a Teams User for the ALICE Application. In the below example, the new user is named “AliceGuest Check-In.”

Step #3 – Configure ALICE Receptionist to Use the ALICE Azure App
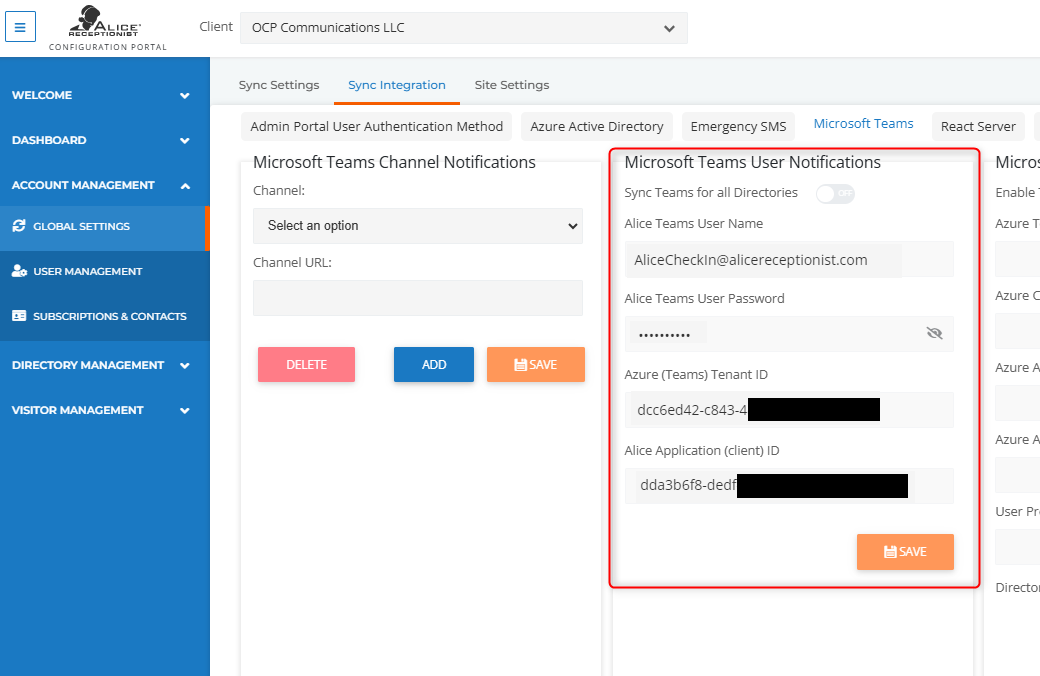
Log into the ALICE Portal as an ALICE Administrator. Under Account Management, select Global Settings.
Select the Sync Integrations tab, and then the Microsoft Teams tab.
-
Note: If you would like to restrict this integration to only one ALICE Directory, configure these settings under Visitor Management by selecting Check-in Settings. Use the Integration tab to find the directory-specific Teams fields.
Populate the following fields:
-
ALICE Teams User Name – The email associated with the ALICE Teams user.
-
ALICE Teams User Password – The password associated with the ALICE Teams User. It is recommended that this password does not expire.
-
Azure (Teams) Tenant ID – Enter the ID from the Azure Active Directory Properties page in the Azure Portal.
-
ALICE Application (Client) ID – The ID found on the app's registration screen in the Azure Portal.
Once all four fields have been filled, click Save.