ALICE Portal Register Visitors Tab
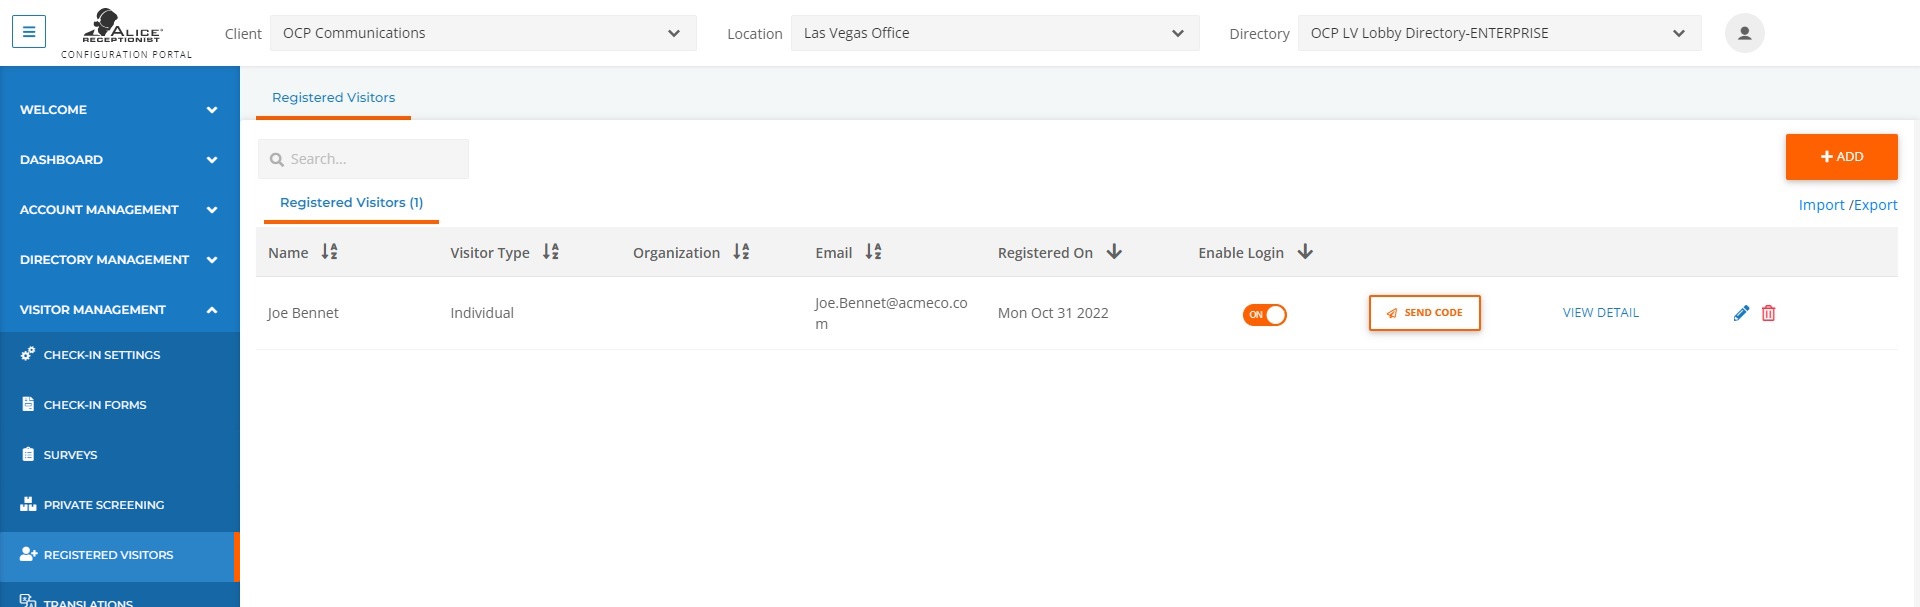
Registered Visitors are individuals who have long-term visitor records on the ALICE system. Visitors can be registered directly by your team, or the system can be configured to let visitors register themselves. For self-registration, find details about enabling this feature in the ALICE Portal Reserved Fields Tab section of Check-In Forms.
Creating a New Registered Visitor
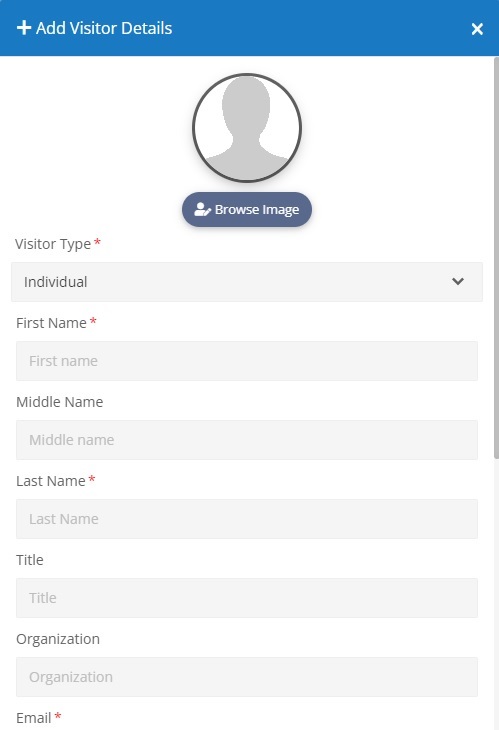
To create a new Registered Visitor, select the orange Add button in the top right corner of the screen. A pop-up window will appear with fields to populate.
-
Use the Browse Image button to upload a photo of the visitor.
-
Visitor Type – Choose whether the visitor is an individual or a vendor.
-
First Name – Type in the visitor’s first name.
-
Middle Name – Type in the visitor’s middle name.
-
Last Name – Type in the visitor’s last name.
-
Title – The visitor’s title at their organization
-
Organization – The organization the visitor is associated with.
-
Email – The visitor's email address.
-
Mobile Number – The visitor's cell phone number.
-
Work Number – The visitor's desk phone number.
-
Default Language – The visitor’s primary language. This will determine the language of the visitor registration email or MMS message received.
-
Address 1 – The visitor’s home office address.
-
Address 2 – Secondary address information about their home office.
-
City – The city the visitor’s office is located in.
-
State – The state the visitor’s office is located in.
-
Zip Code – The zip code the visitor’s office is located in.
-
US Citizen – Sets whether the visitor is a US Citizen or not.
-
Yes – Set the toggle to the right.
-
No – Set the toggle to the left
-
Unknown – Set the toggle to the middle. ALICE will ignore this field.
-
-
Code – The visitor will need to input this code to check in when not utilizing their QR code. A code will be automatically generated if the field is left blank.
-
For Cloud database users creating custom codes, this number must be unique among all ALICE users. Some codes may not be available for your organization.
-
For Local database users, this ID must be unique on your database. No users will be allowed to have duplicate codes.
-
-
Enable Login – Determines whether the user can log in using this registered visitor code.
-
On – The user can log in using this code.
-
Off – The user cannot log in with this code until re-enabled.
-
Editing a Registered Visitor
Click the  icon in the last column of the row. A pop-up window will appear where the listing's settings can be edited.
For details on each field, refer to the ALICE Portal Register Visitors Tab
Sending Registered Visitor Information to Guests
The Send Code option will send a visitor their Registered Visitor information. You will be provided a preview of the message and the option to send the information via email or MMS to the email or mobile number registered to the visitor.
Registered Visitors can opt out of receiving text messages from the ALICE messaging service at any time. To stop, they can type any of the following phrases:
STOP
CANCEL
END
QUIT
UNSUBSCRIBE
STOPALL
Registered Visitors can opt back in and resume receiving messages from the ALICE messaging service by responding with any of the following:
START
UNSTOP
YES
Registered Visitors can receive these instructions by sending “HELP” to the ALICE messaging service.
Disabling a Registered Visitor
To temporarily disable a Registered Visitor, set the visitor’s Enable Log-in toggle to “Off” in the registered visitor listing’s row. To re-enable them, toggle this setting to “On.”
Deleting a Registered Visitor
Click the  icon on the far-right column of the row. A pop-up window will ask for confirmation on deleting the listing from the database.
Note: This action cannot be undone. The listing will be removed from the portal. The related records will be retained.