ALICE Portal Notifications Tab
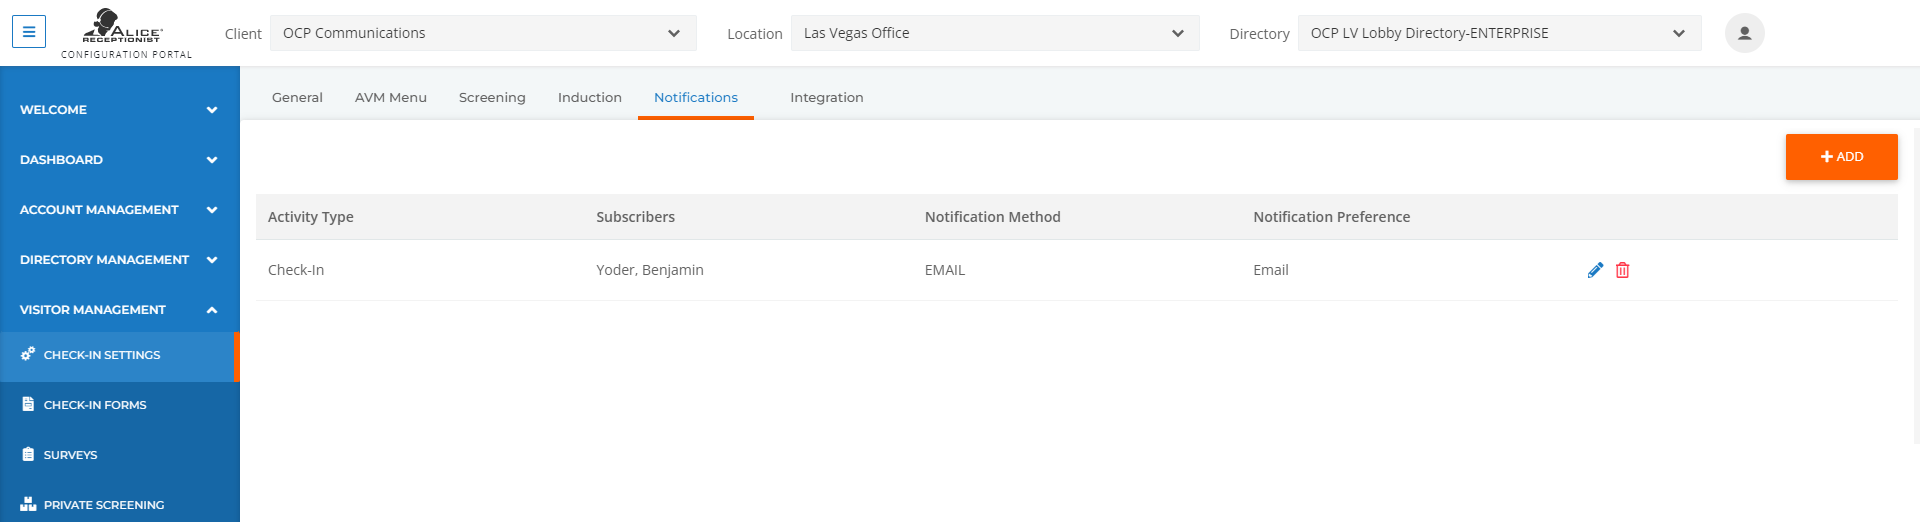
The Notification tab contains configuration options for notifications that alert employees of events on the ALICE Receptionist Kiosk.
Check-in / out notifications to a host directly can be found in the ALICE Portal Employees Tab section.
Related Videos
Add a New Notification
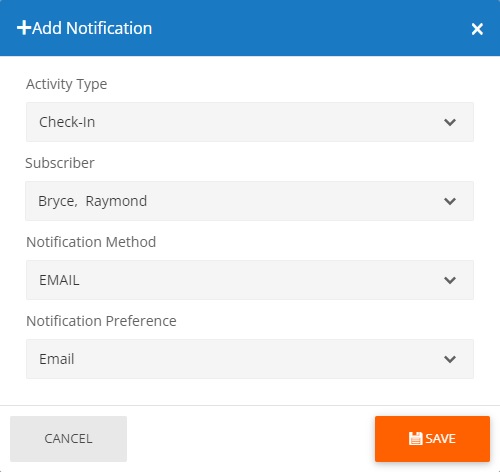
To add a new Notification, select the orange Add button in the top right corner of the screen.
-
Activity Type – This drop-down determines what will trigger the notification to be sent.
-
Check-in – Whenever a visitor completes the check-in process, regardless of the host they check in with.
-
Scanner Offline – If the ID Scanner connected to the ALICE Receptionist Kiosk goes offline.
-
Security Notification – When a visitor is flagged on a screening list.
-
Temperature Check Alert – When a visitor is flagged for elevated temperature.
-
-
Subscriber – Select who will receive notifications when a trigger is activated.
Note: The Employees available are based on those in the ARD
 The ALICE interface that appears on the ALICE Kiosk in your Lobby, also known as the ALICE Receptionist Directory's Membership. Refer to the ALICE Portal Directories Tab section to add an Employee listing to an ARD's Membership.
-
Notification Method – Determines how the notification will be sent to the selected employee.
- Email – Send the notification to the employee's email address.
-
Mobile App – Sends the notification to the employee’s ALICE Mobile app.
-
Slack – Sends the notification to the employee’s Slack client.
-
SMS – Send the notification to the employee’s phone number. The number messaged is determined by the Notification Preference selected from the drop-down menu when this option is selected. Refer to the ALICE Portal Employees Tab section for more details.
-
Microsoft Teams – A notification will be sent to the employee’s Team Client or the associated Teams Channel. Refer to the ALICE Portal Employees Tab section for more details.
Editing a Notification Setting
Click the  icon in the last column of the row. A pop-up window will appear where the listing's settings can be edited.
Refer to the ALICE Portal Notifications Tab section for details on each field.
Deleting a Notification Setting
Click the  icon on the far-right column of the row. A pop-up window will ask for confirmation on deleting the listing from the database.