ALICE Mobile App Visitors Page
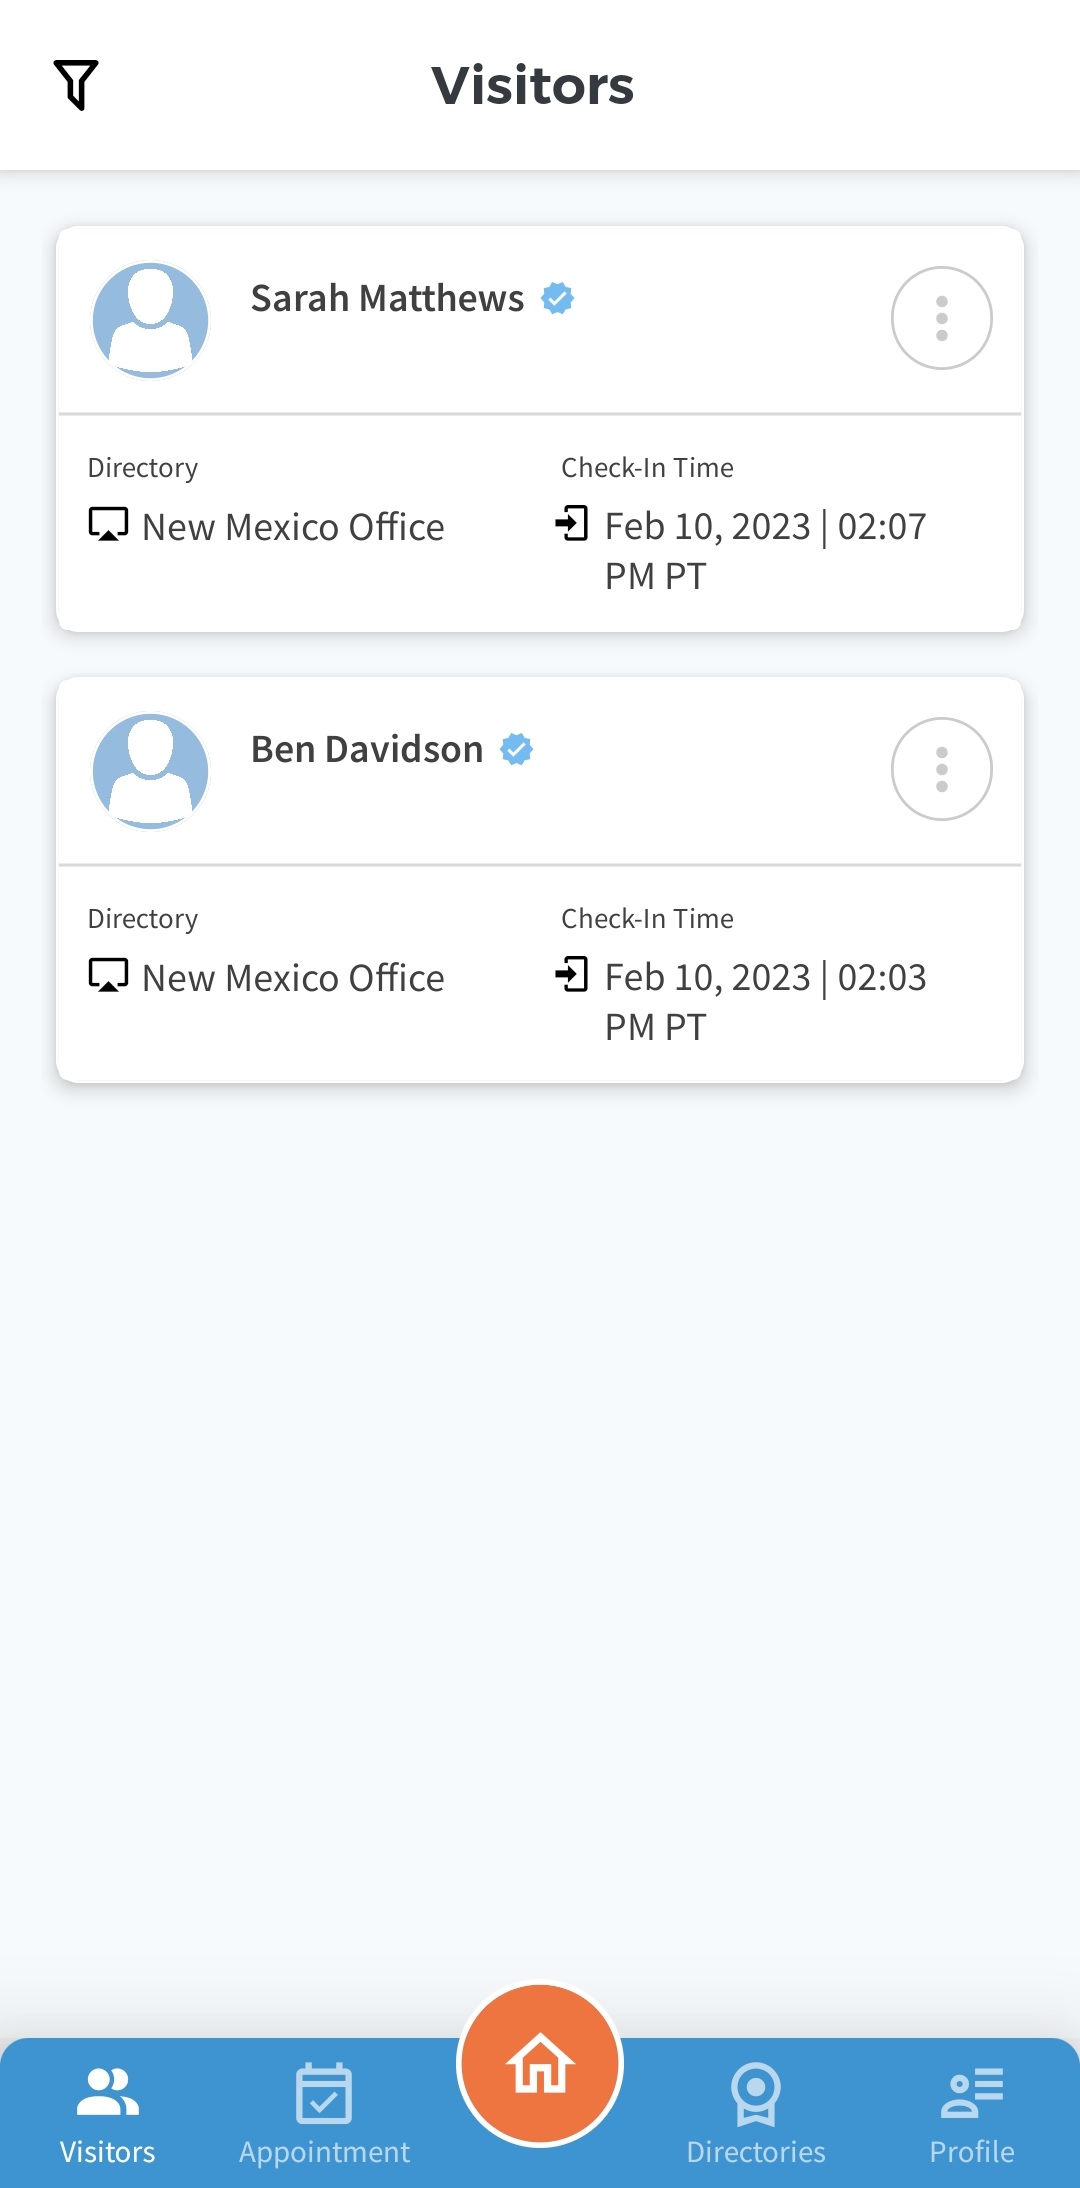
The Visitor page allows you to view, manage, and contact visitors who have checked in with you on the ALICE Directory. The visitor card includes their name, where they checked in, and time they checked in.
Related Videos

Viewing Visitors Records
By default, the Visitor page shows all Active Visitors you are hosting, with the latest visitor appearing at the top of the page. Swiping down on the page will refresh the list with the latest information.
Setting a Filter
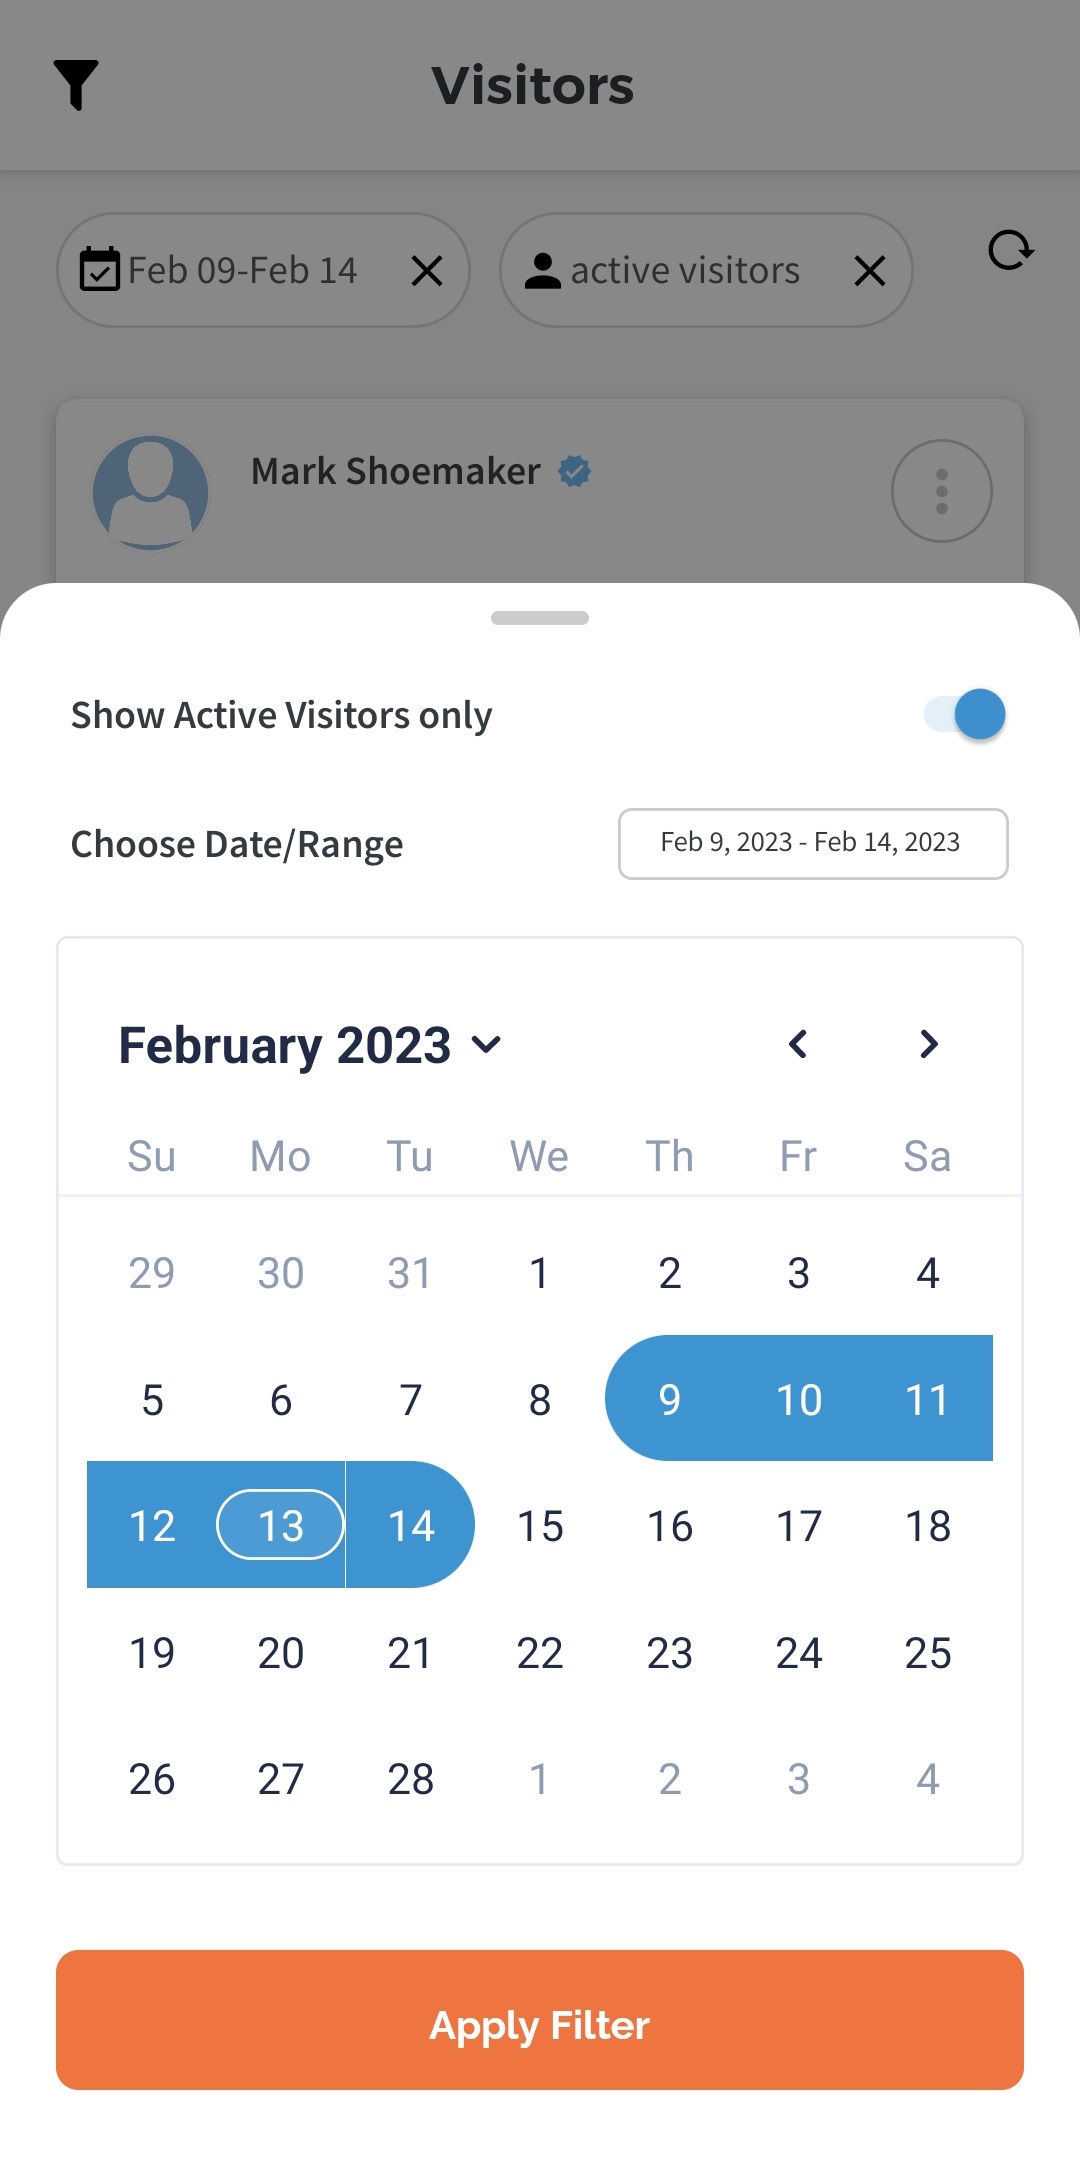
Additional filtering options are available by selecting the  icon in the top left corner of the Visitor page. This will allow you to see both Active Visitors and past visitors.
-
Show Active Visitors only – When enabled, only active visitors will appear.
-
Choose Date / Range – Select the range of dates that the report will pull from by tapping the start and end dates.
-
Change the month by tapping the tap the left and right to move to the previous or following month.
-
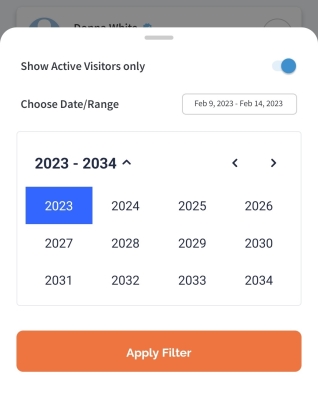
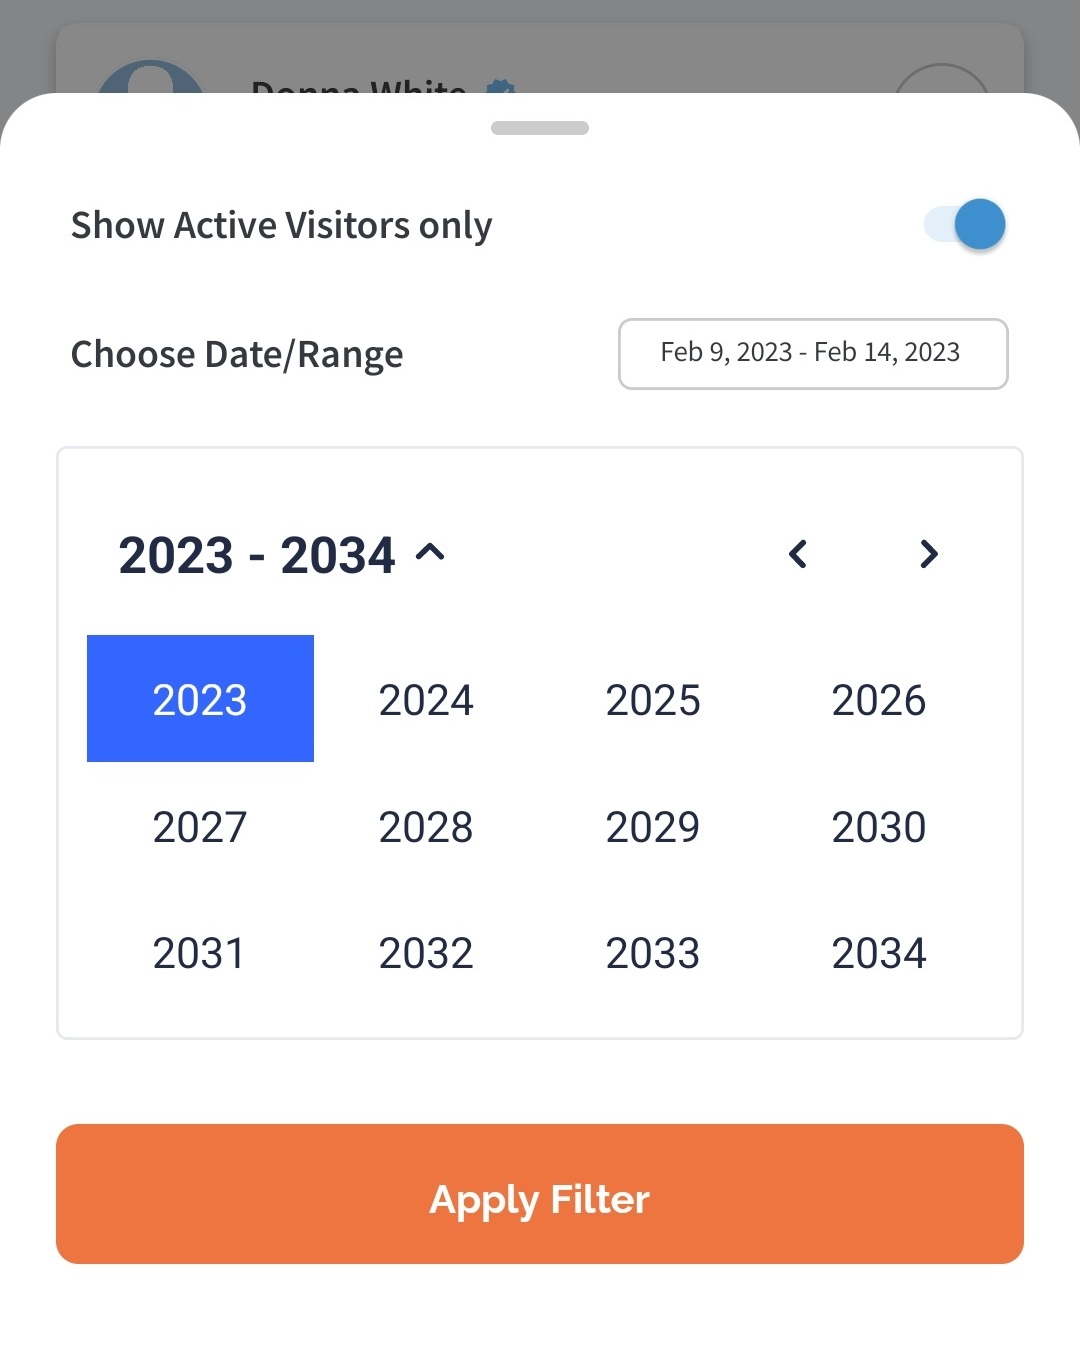
To change the year, select the down arrow by the year listed. The calendar will change to a year view. Tapping the year will open the months within that year. Tap the month to re-open the calendar . Years appear in 10 years intervals. To navigate to a previous or future set of years, tap the left and right arrow buttons.
-
Clearing a Filter
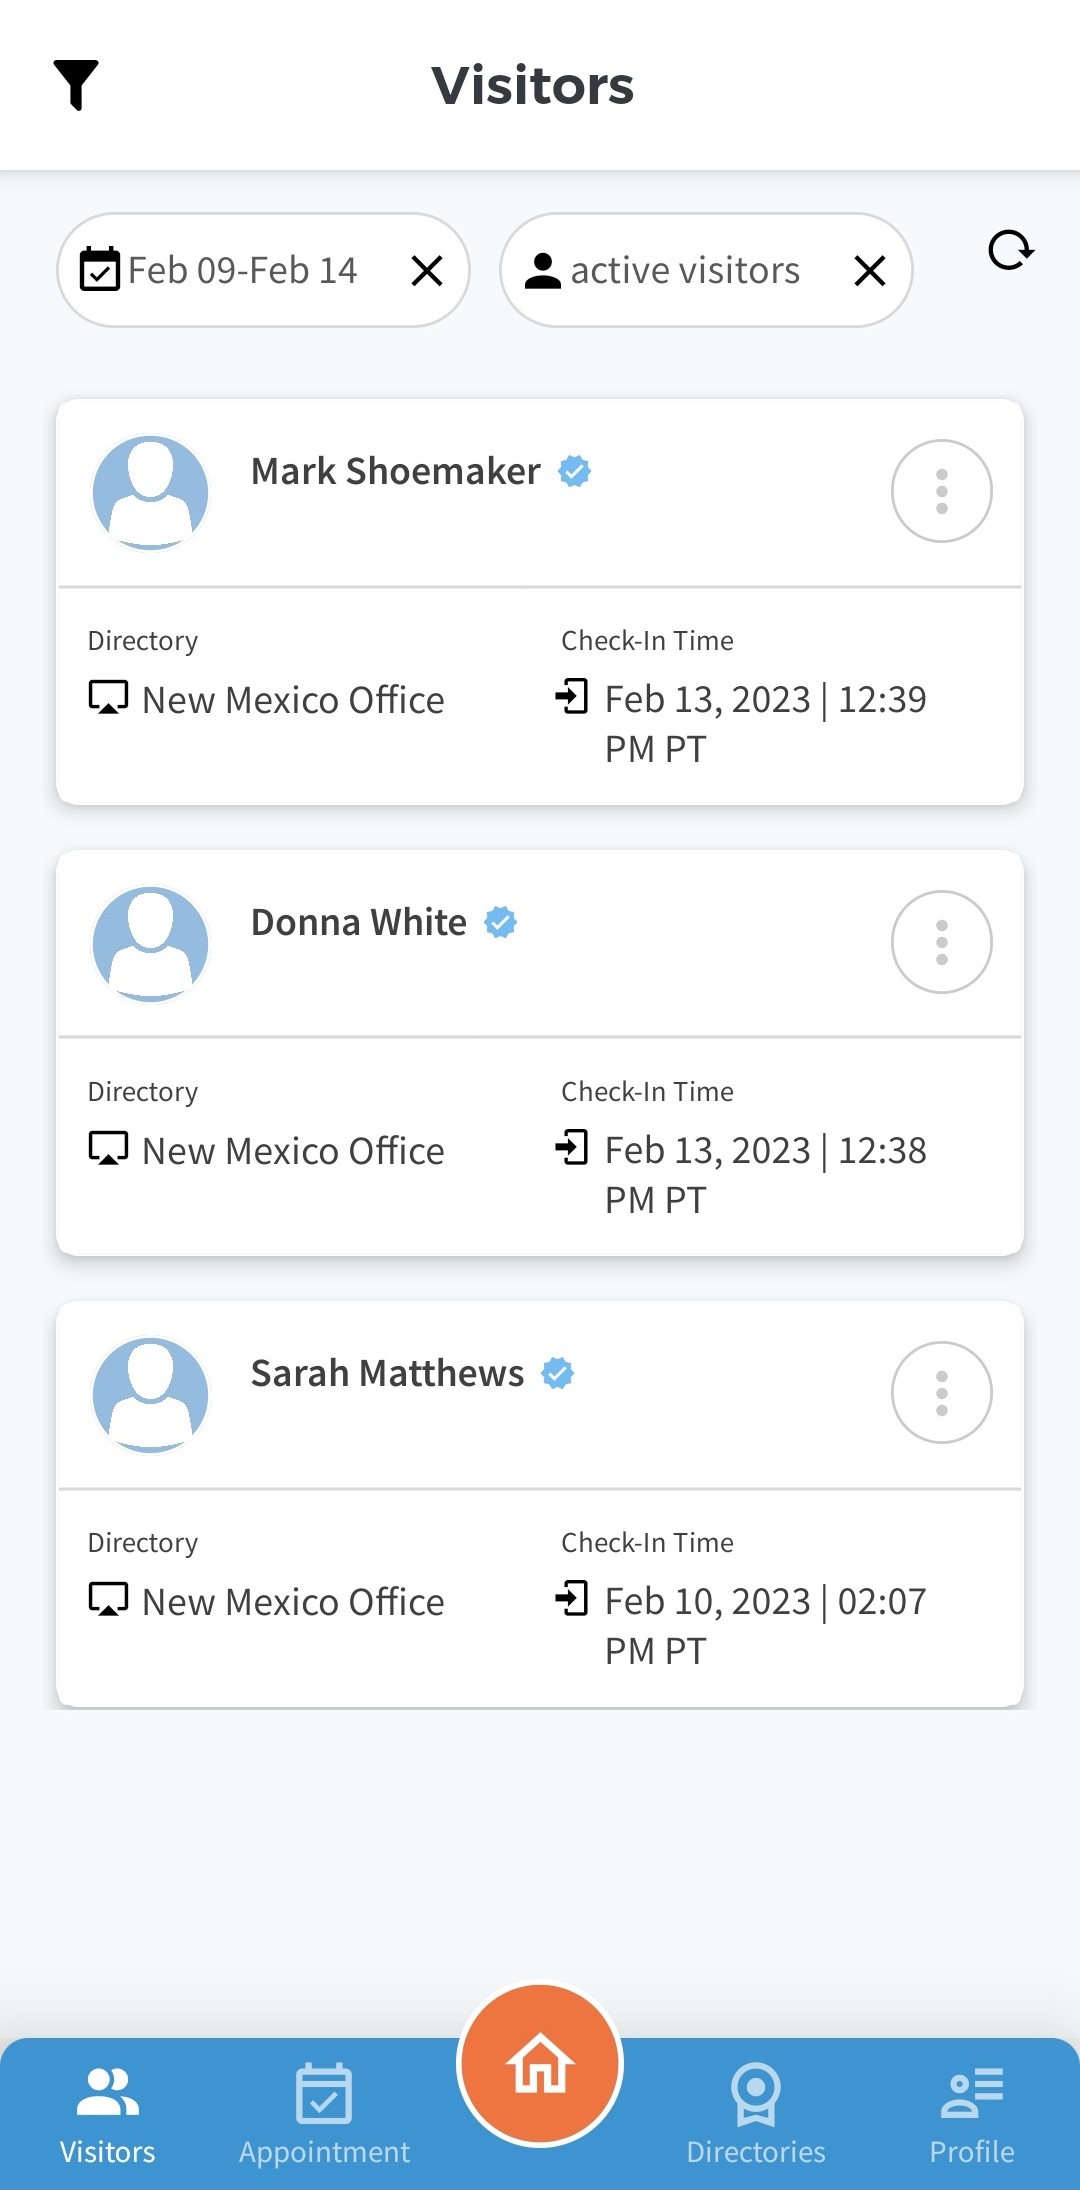
When filters are applied, the properties of the filter appear at the top of the Visitor page. To clear the property, select the x button by each filter.
Once all filters are removed, the list will have its default settings.
Visitor Detail View
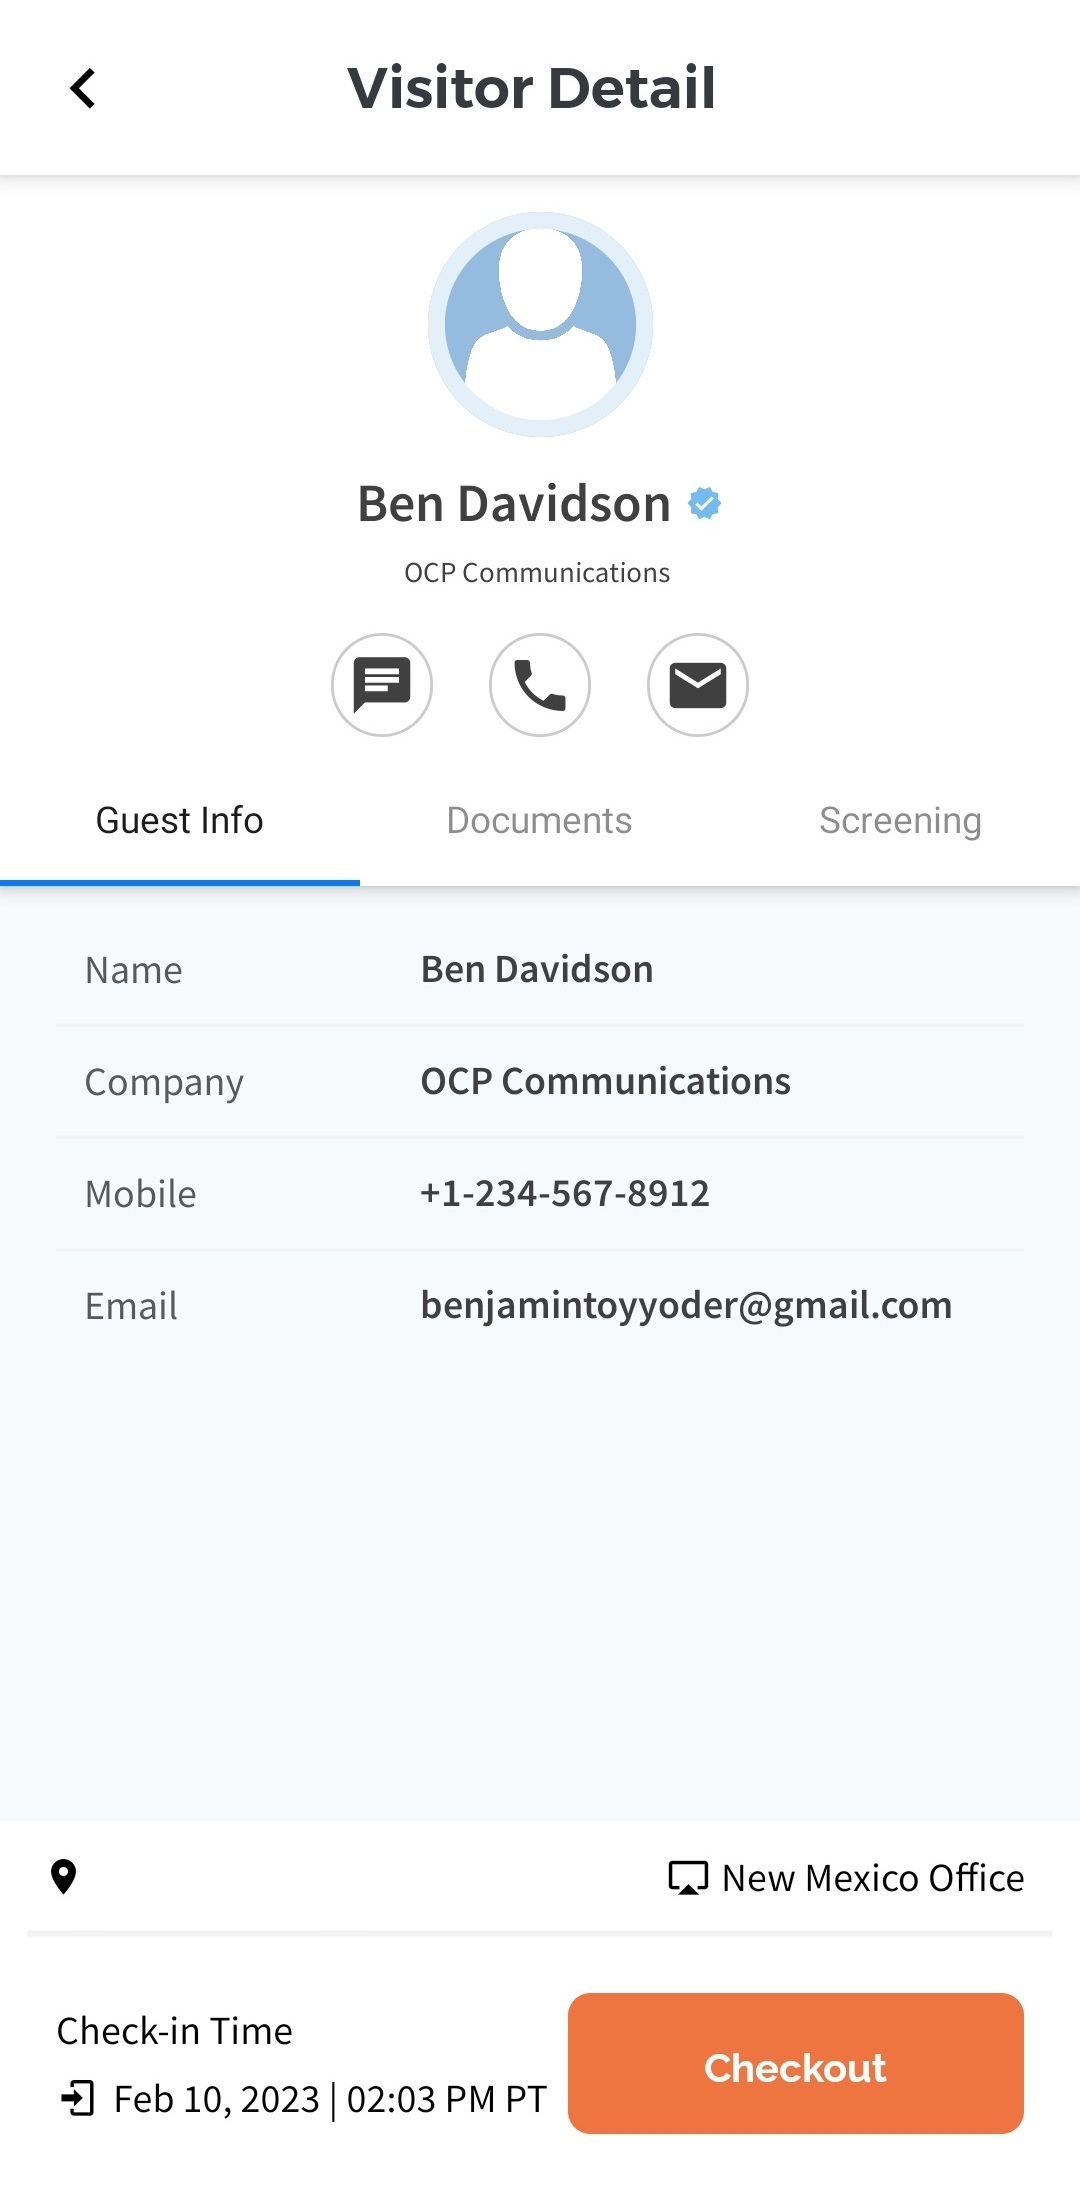
Selecting the visitor card will open a detailed view of their check-in information.
Guest Info
The Guest Info tab includes information provided on the Check-in Form on the ALICE Directory.
-
Name – The visitor's first and last name.
-
Company – The company the visitor is representing.
-
Mobile – The visitor's mobile number.
-
Email – The visitor's email address.
Documents Tab
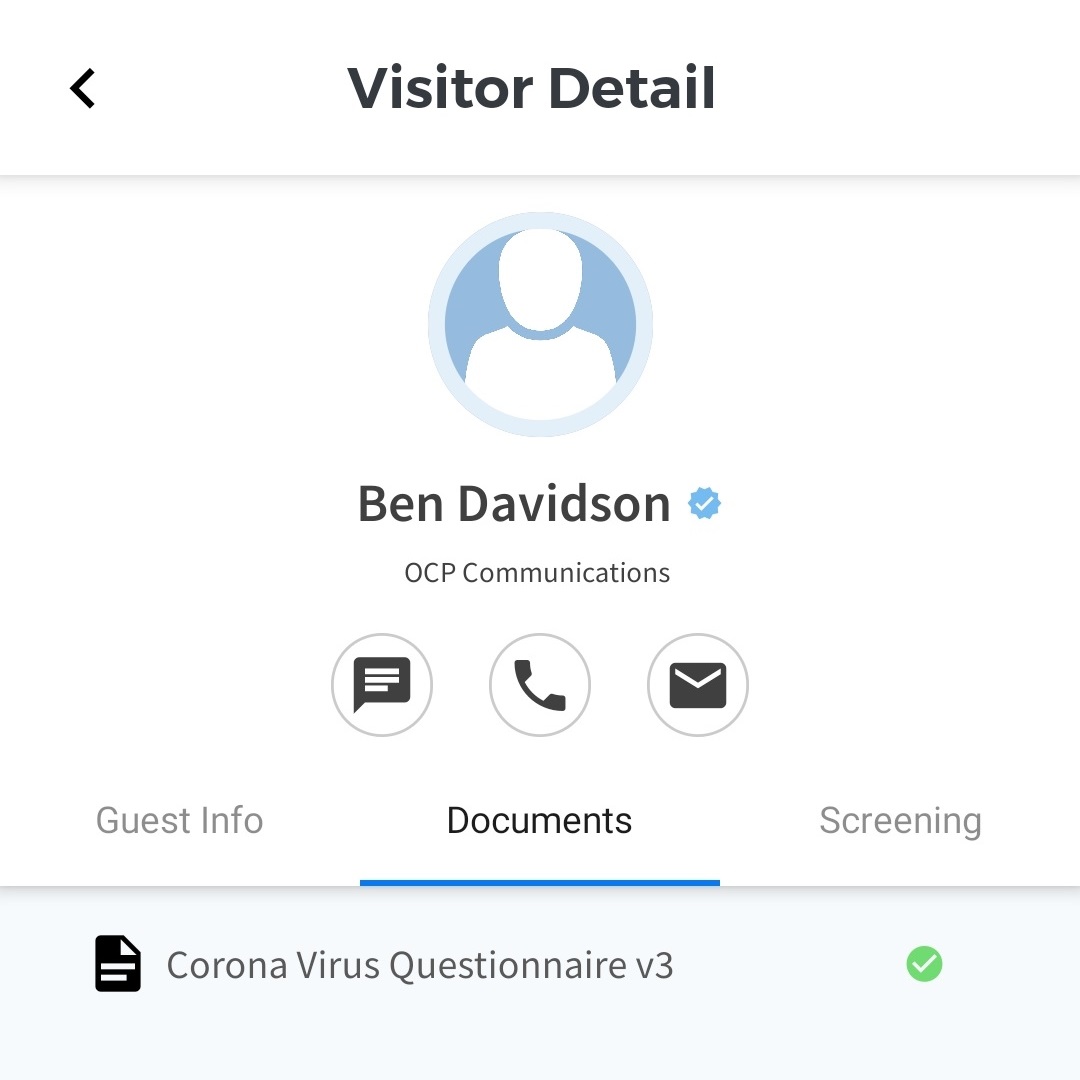
The Document tab includes any induction materials reviewed, acknowledged, and signed by the visitor. If the material has been signed or acknowledged, a check mark will appear by the induction material.
Screening Tab

The screening tab includes information on any screening processes that the visitor was checked against.
Contacting a Visitor
If a visitor has provided their mobile number or email, they can be contacted using the ALICE Mobile App.
Contact Through Visitor Card
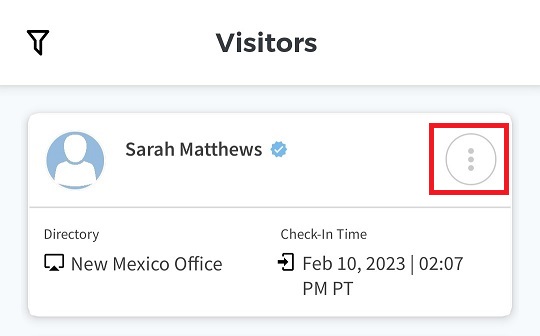
Visitor can be contacted through their visitor card using the three dots at the top right corner of the card.
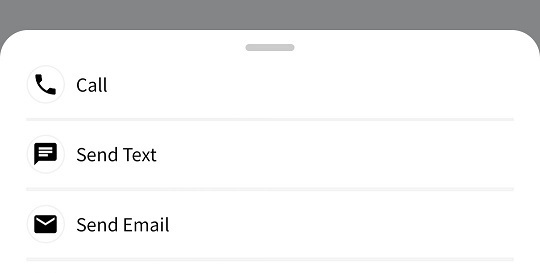
A pop-up window will appear with three options.
-
Call – Opens your phone app and pre-populates the visitor's number.
-
Send Text – Opens your phone's text messaging app and automatically populates the visitor's number.
-
Send Email – Opens your phone's email app and automatically populates the visitor's email.
Contact Through Visitor Detail
Visitor can be contacted through the Visitor Detail view after tapping the visitor's card.

There are three buttons that can be used to contact the individual.
-
SMS Text Message Button (Left) – Opens your phone's text messaging app and automatically populates the visitor's number.
-
Phone Call Button (Middle) – Opens your phone app and pre-populates the visitor's number.
-
Email Button (Right) – Opens your phone's email app and automatically populates the visitor's email.
Checking Out Visitors
Visitors can check themselves out on the ALICE Directory. However, if they fail to do so, their host can check them out using the ALICE Mobile App.
There are two different options for checking a visitor out.
Check Out Through Visitor Card
Visitor can be checked out through their visitor card using the three dots at the top right corner of the card.
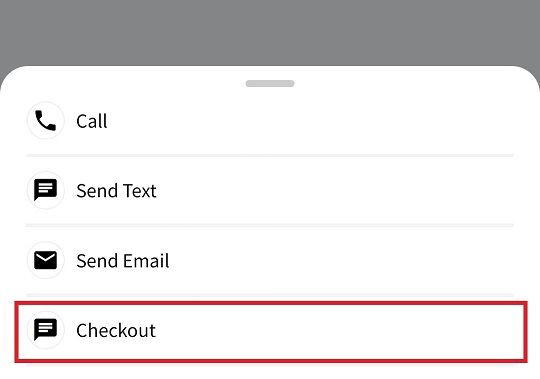
A pop-up window will appear. Tap the Checkout option from the bottom of the list. A check out confirmation will appear once the request has been processed.
Check Out Through Visitor Detail View
Visitor can be contacted through the Visitor Detail view after tapping the visitor's card.
At the bottom of the detailed view, tap the orange Checkout button. A check out confirmation will appear once the request has been processed.